Table of contents
- Edit the content of a default email template
- Create a new template from scratch
- Language settings
- Saving email templates with multiple translations
- Link expiration
Click the user icon in the top right and then Settings to see the email templates.

Email templates under Settings
See the following email templates from this view:
- Collaboration invite - invite someone for a collaboration.
- Collaboration invite (with a personal message) - invite someone to collaborate with a personal message.
- Collaboration reminder - send a reminder to a collaborator.
- Invite - invite someone from the organization to manage Supplier Management.
- Questionnaire submitted - a notification sent to subscribed users stating when a survey has been submitted.
- Supplier invite - the email sent when inviting a supplier.
- Supplier invite (with a personal message) - inviting a supplier with a personal message.
- Supplier reminder - remind suppliers to complete pending surveys.
- Other - this type of email can be sent from anywhere and is created from scratch.
Edit the content of a default email template
To edit a template, click the template. The email will open, and the language tabs are shown along the top of the email.

Email template with the language tabs
Click “Edit” to open the email editor and edit the text and links.
Click “{x}” to open a list of items that can be added:
- Sender name: Full name of the sender.
- Sender e-mail: Email of the sender.
- Recipient name: Full name of the recipient.
- Recipient email: Email of the recipient.
- Supplier owner name: Full name of the supplier owner of this supplier
- Supplier owner email: Email of the supplier owner of this supplier
- Organization Contact name: Name of the organization's contact person
- Organization Contact email: Email of the organization's contact person
- Organization name: The name of the organization.
- Custom message: Space for a custom message to be added before sending out the email to the supplier.
- Deadline: deadline for filling out the survey
- Supplier name: Name of the supplier associated with the email.
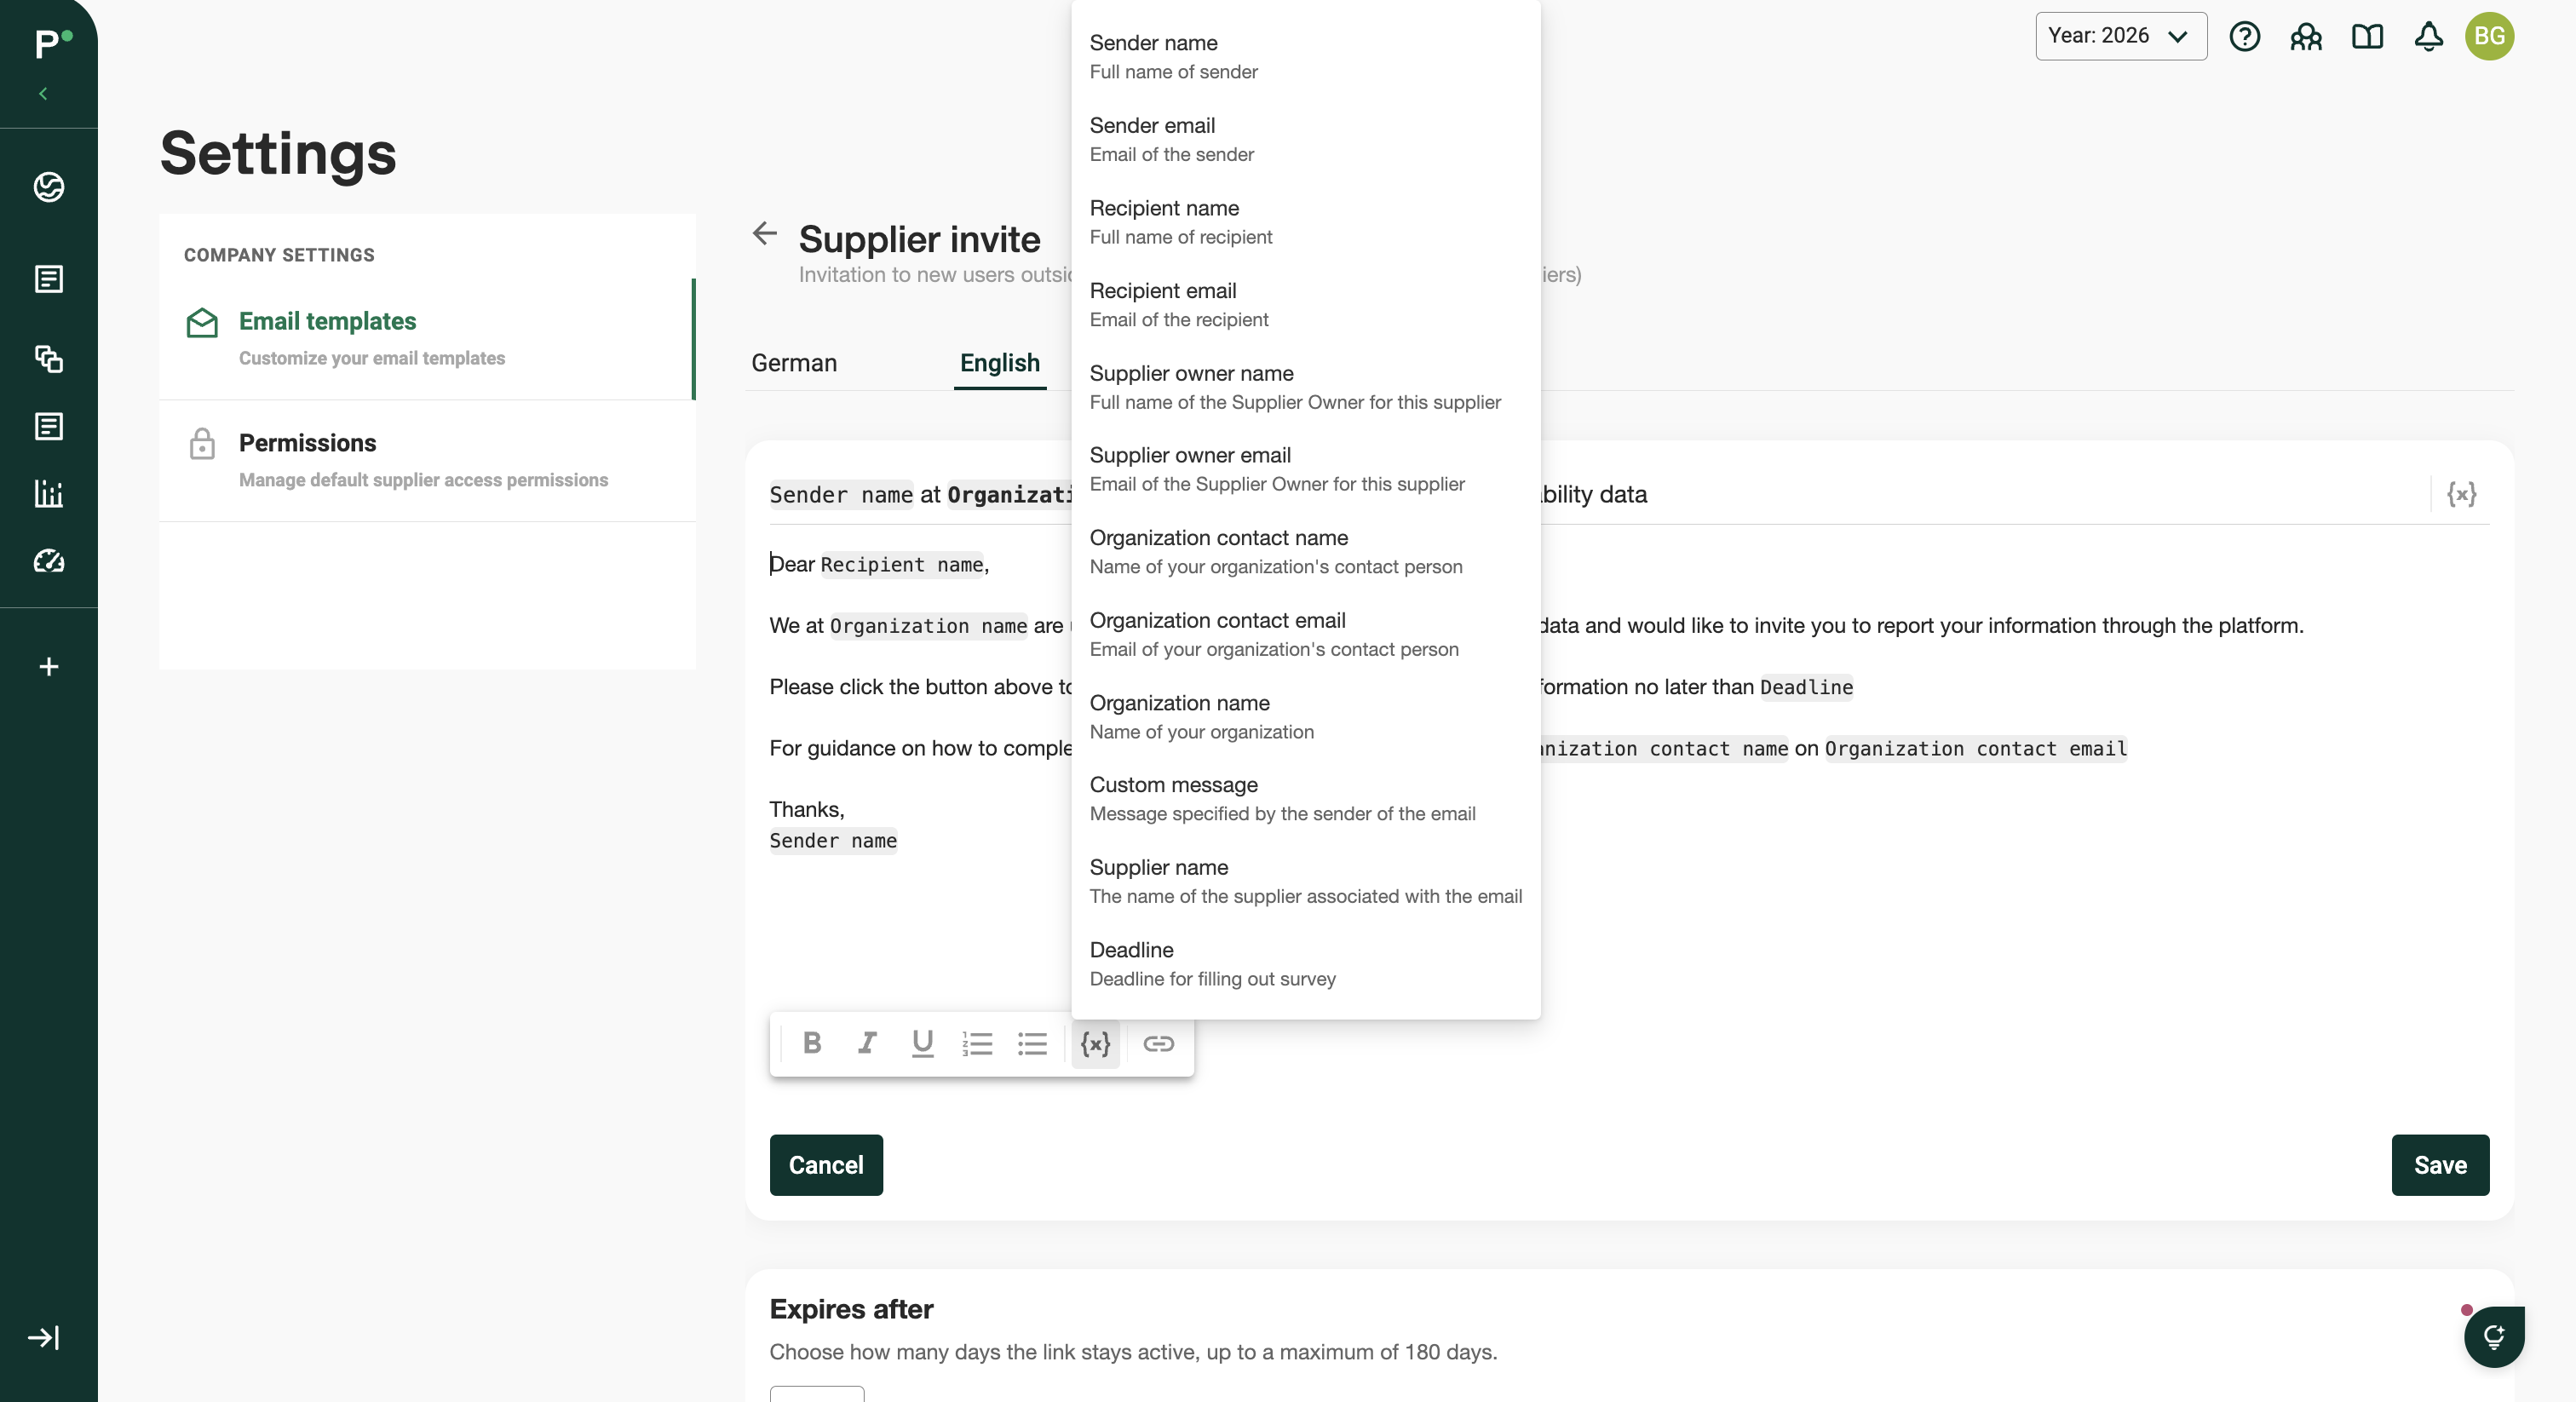
List of items that can be added to an email template
Create a new template from scratch
Step 1 - Switch to the Custom tab and click “New template”.
Step 2 - Select the template type based on how the template will be used. Different types are available for different purposes.
Step 3 - Add a meaningful name and a description to the template. The name is displayed when selecting which template to use.
Step 4 - Add the text to send in the email. Use the dynamic elements to customize the content depending on the recipient, measure and org.unit.
Step 5 - English and Swedish are available as languages. Recipients receive one of the two versions, depending on their language settings on the platform. Adding a translation is optional.
Step 6 - Save the changes.
Language settings
The email is sent in the language selected in the recipient's language setting.
The emails can be sent out through the Suppliers overview, Surveys overview, and Follow-up overview.
Saving email templates with multiple translations
When creating or saving an email template, translations are handled differently depending on whether they are enabled or disabled:
- Enabled translations must contain text. If any enabled translation is left empty, the template cannot be saved.
- Disabled translations (removed from the template) do not require any content.
Example
When a custom template is opened, the English translation is enabled by default.
- If no English version is needed, remove it from the translation tab.
- Once it is removed, the German (or other language) template can be saved without any issues.
Tip
Include as many languages as needed in one email. However, every enabled translation must be filled in before saving. If a translation is not needed, remove it so the tab is empty (as shown in the example image).
Link expiration
Each email template has a configurable link expiration period. This determines how long links included in the email remain active after the email has been sent.
The Expires after column in the template overview shows the current expiration period for each template.

Expires after column in the template overview
Configure link expiration
Step 1 - Open the email template to configure.
Step 2 - Scroll down to the Link expiration section.
Step 3 - Enter the number of days the link should remain active in the Expires after field. The expiration period can be set between 1 and 180 days.
Step 4 - Click “Save”.
Use the default expiration period
To revert a changed expiration period to the standard setting, click “Use default”. The default expiration period will be displayed on the button.
Important notes
- Link expiration is configured separately for each email template.
- Once a link has expired, recipients will no longer be able to access it through the original email.
- Consider using a shorter expiration period for time-sensitive requests and a longer period when recipients may need additional time to respond.
Was this article helpful?
That’s Great!
Thank you for your feedback
Sorry! We couldn't be helpful
Thank you for your feedback
Feedback sent
We appreciate your effort and will try to fix the article