Position Green includes configurable validation settings that strengthen the four-eyes principle in Data Reporting. When enabled, the platform warns (or prevents) a reporter from confirming a registration if the same reporter was the last person to edit at least one data point in that registration.
For the full end-to-end workflow (roles, process steps, and general guidance), see:
Purpose
The four-eyes principle is a data integrity control that requires at least two distinct individuals to participate in data entry and verification. These validation settings reduce the risk of self-validation loops and improve transparency for review and audit.
Where the settings are configured
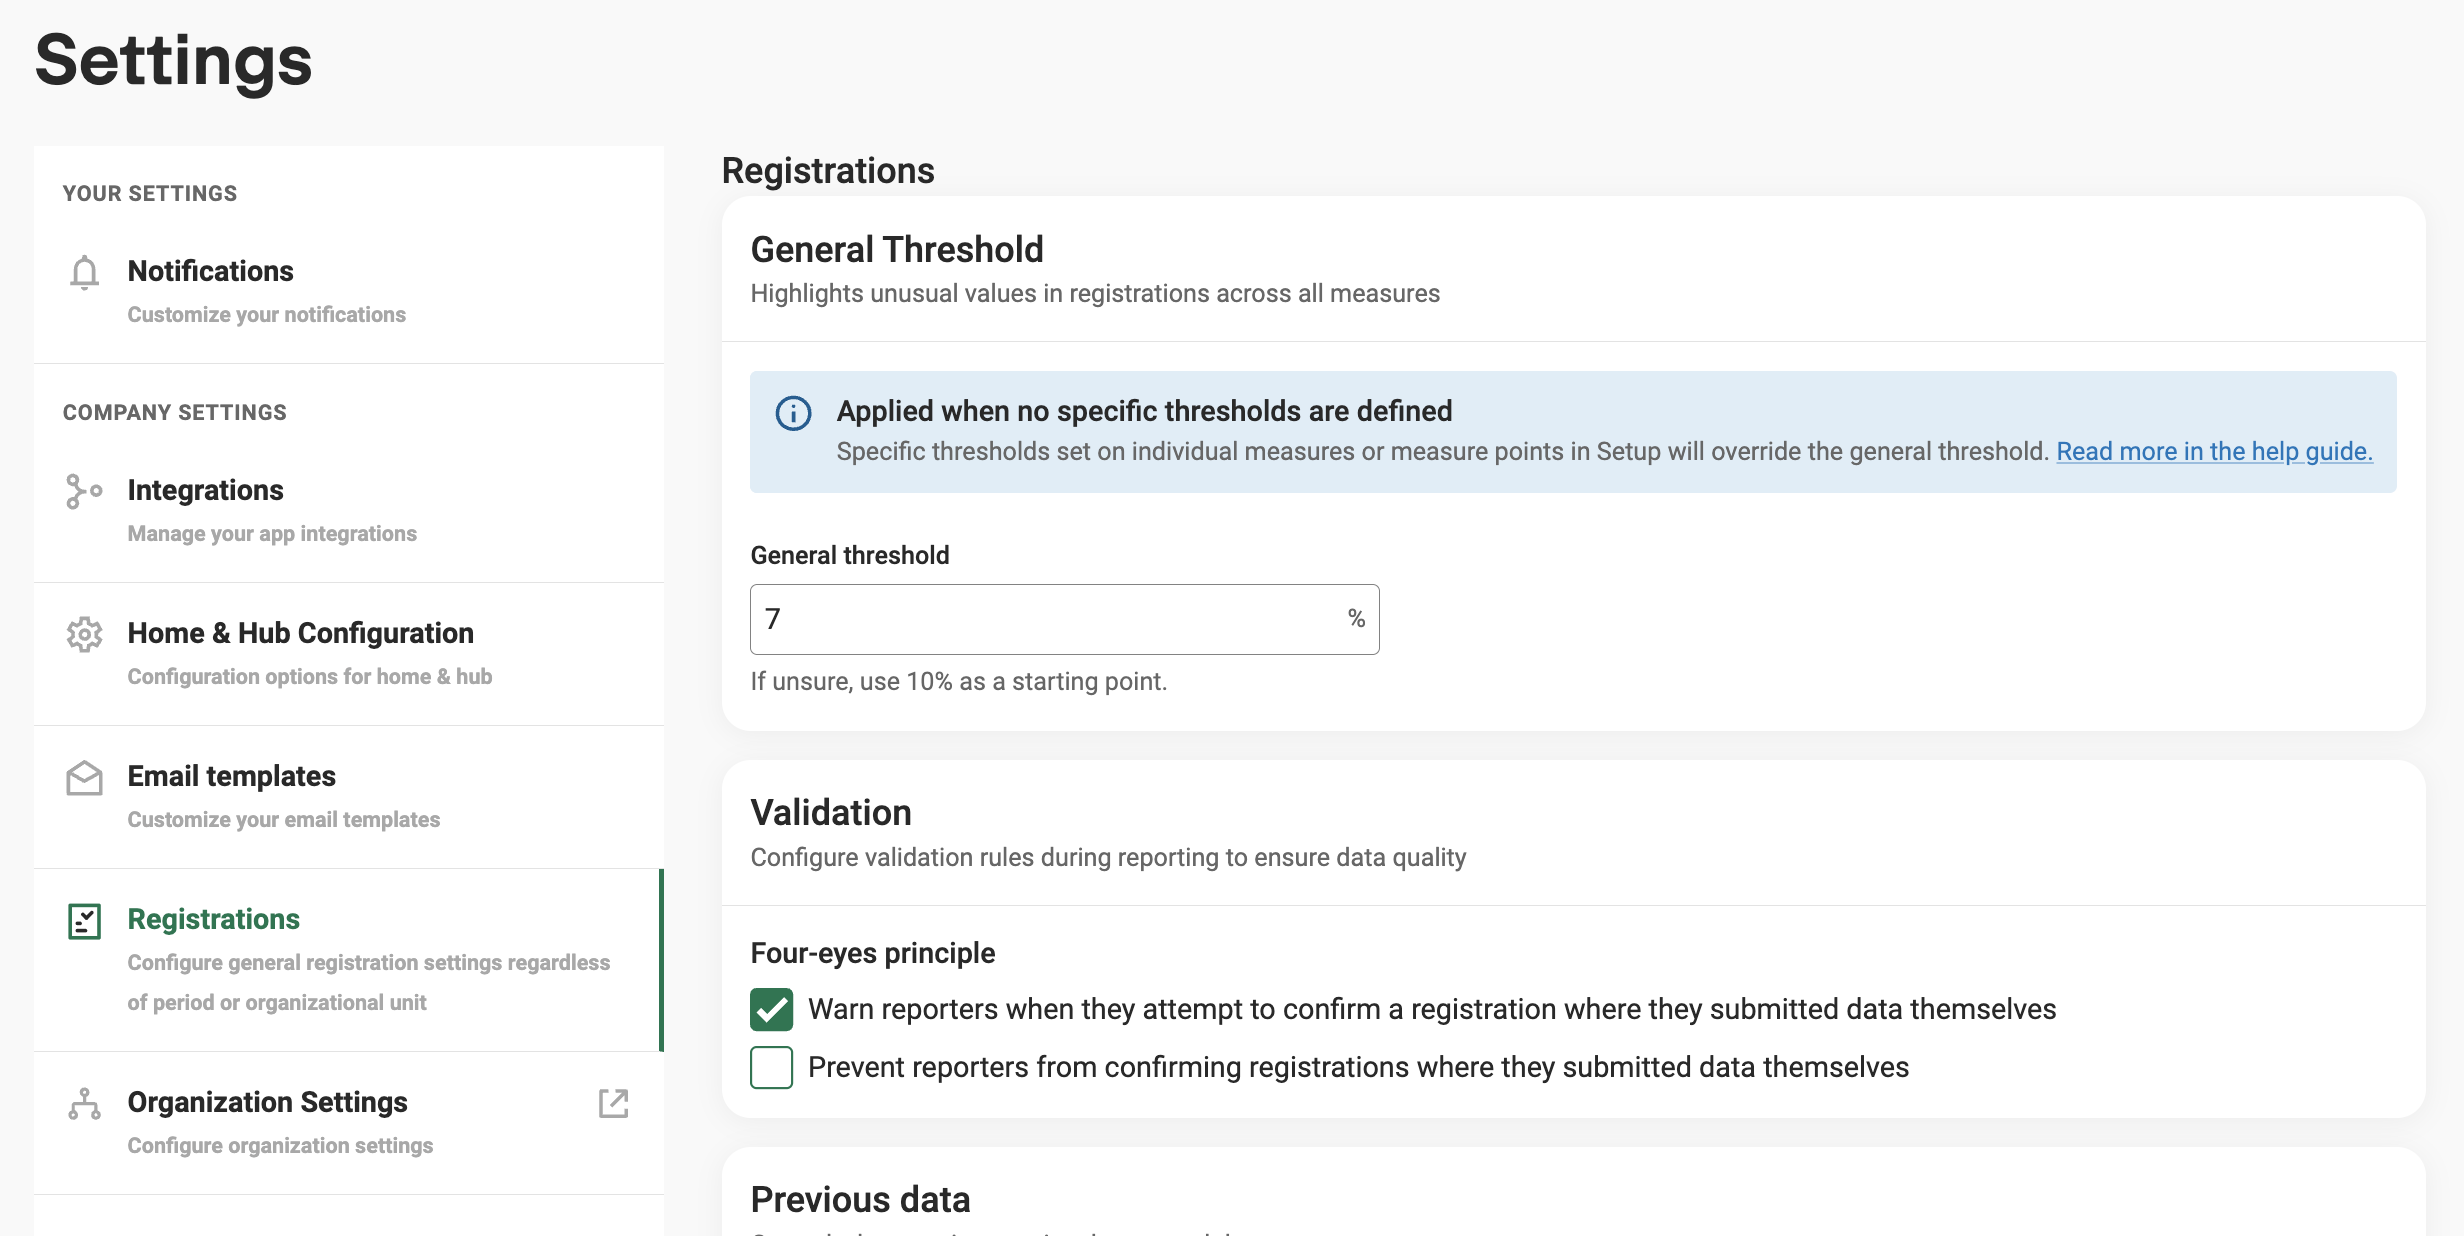
Configuration is managed in “Settings” by users with Setup access.
Path: “Settings” → “Registrations” → “Validation” → “Four-eyes principle”
Available settings
Two checkboxes are available under “Four-eyes principle”:
- "Warn reporters when they attempt to confirm a registration where they submitted data themselves"
Enables a warning dialog when confirmation is attempted and at least one data point was last edited by the same reporter. - "Prevent reporters from confirming registrations where they submitted data themselves"
Blocks confirmation entirely in the same scenario.
Notes:
- The prevention setting can only be enabled if the warning setting is enabled.
- Disabling the warning setting also disables the prevention setting.
What triggers the warning or block
A dialog appears when the following conditions are met:
- A reporter clicks the "Confirm" action for a registration in Data Reporting, and
- The same reporter was the last editor of one or more data points in that registration
If no data points were last edited by the confirming reporter, confirmation proceeds without interruption.
What happens during confirmation
When the validation is triggered, a dialog titled “Validation needed by other person” is shown instead of confirming immediately. The dialog lists which fields were last edited by the confirming reporter and provides actions to hand off confirmation.
If only the warning setting is enabled
A warning message is shown: “You should not confirm data you have edited yourself.”
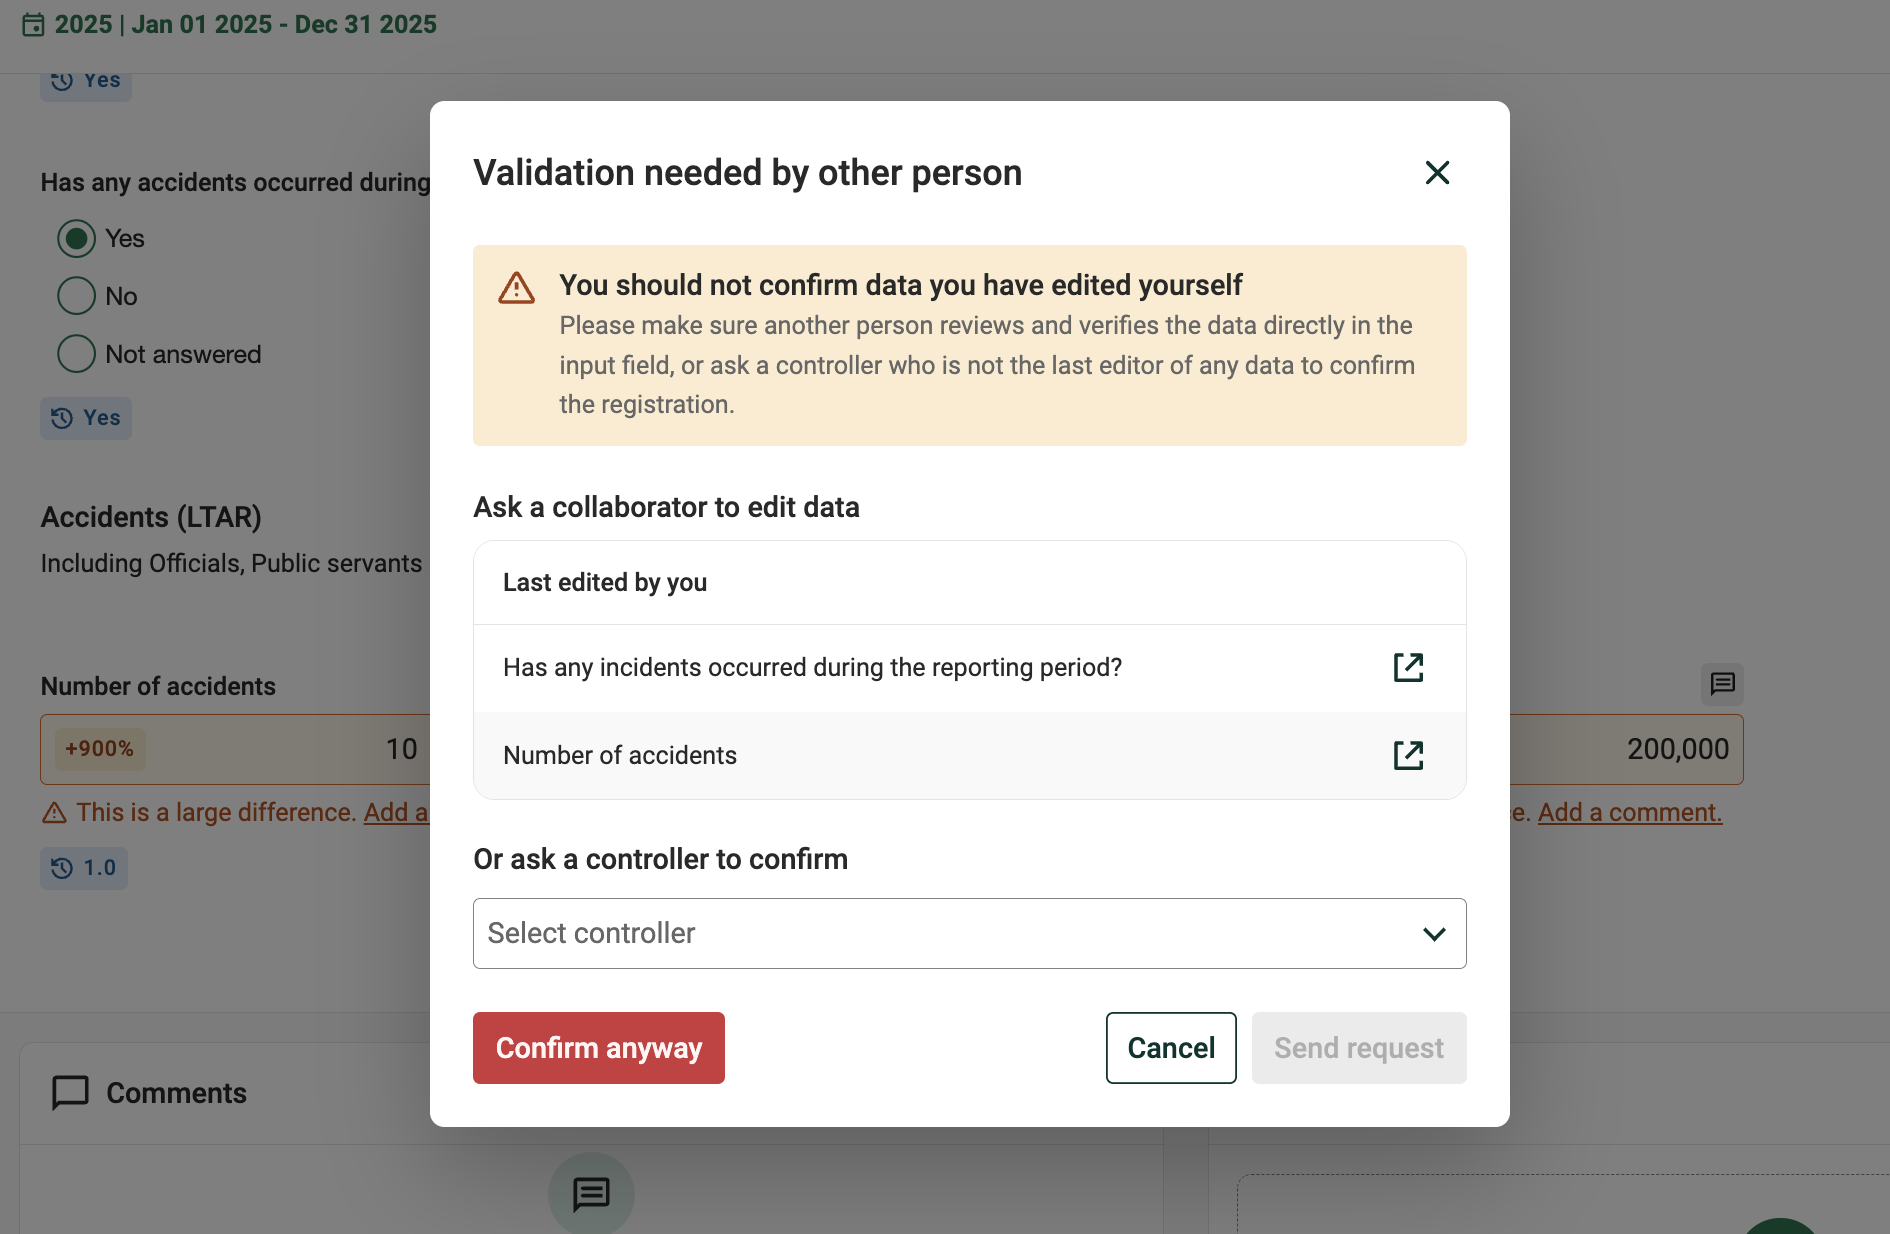
Example of warning message when trying to confirm a registration where data was edited.
The reporter now has three options:
- Ask another collaborator or reporter to review and edit the data points.
- Click a data point in the list. Now the "Data reporting" view opens and scrolls down to the data point, where the reporter gets a suggested, prefilled comment to send to a collaborator. The reporter needs to @mention a collaborator and click "Add" comment. Both the mentioned collaborator and the reporter will get a notification.
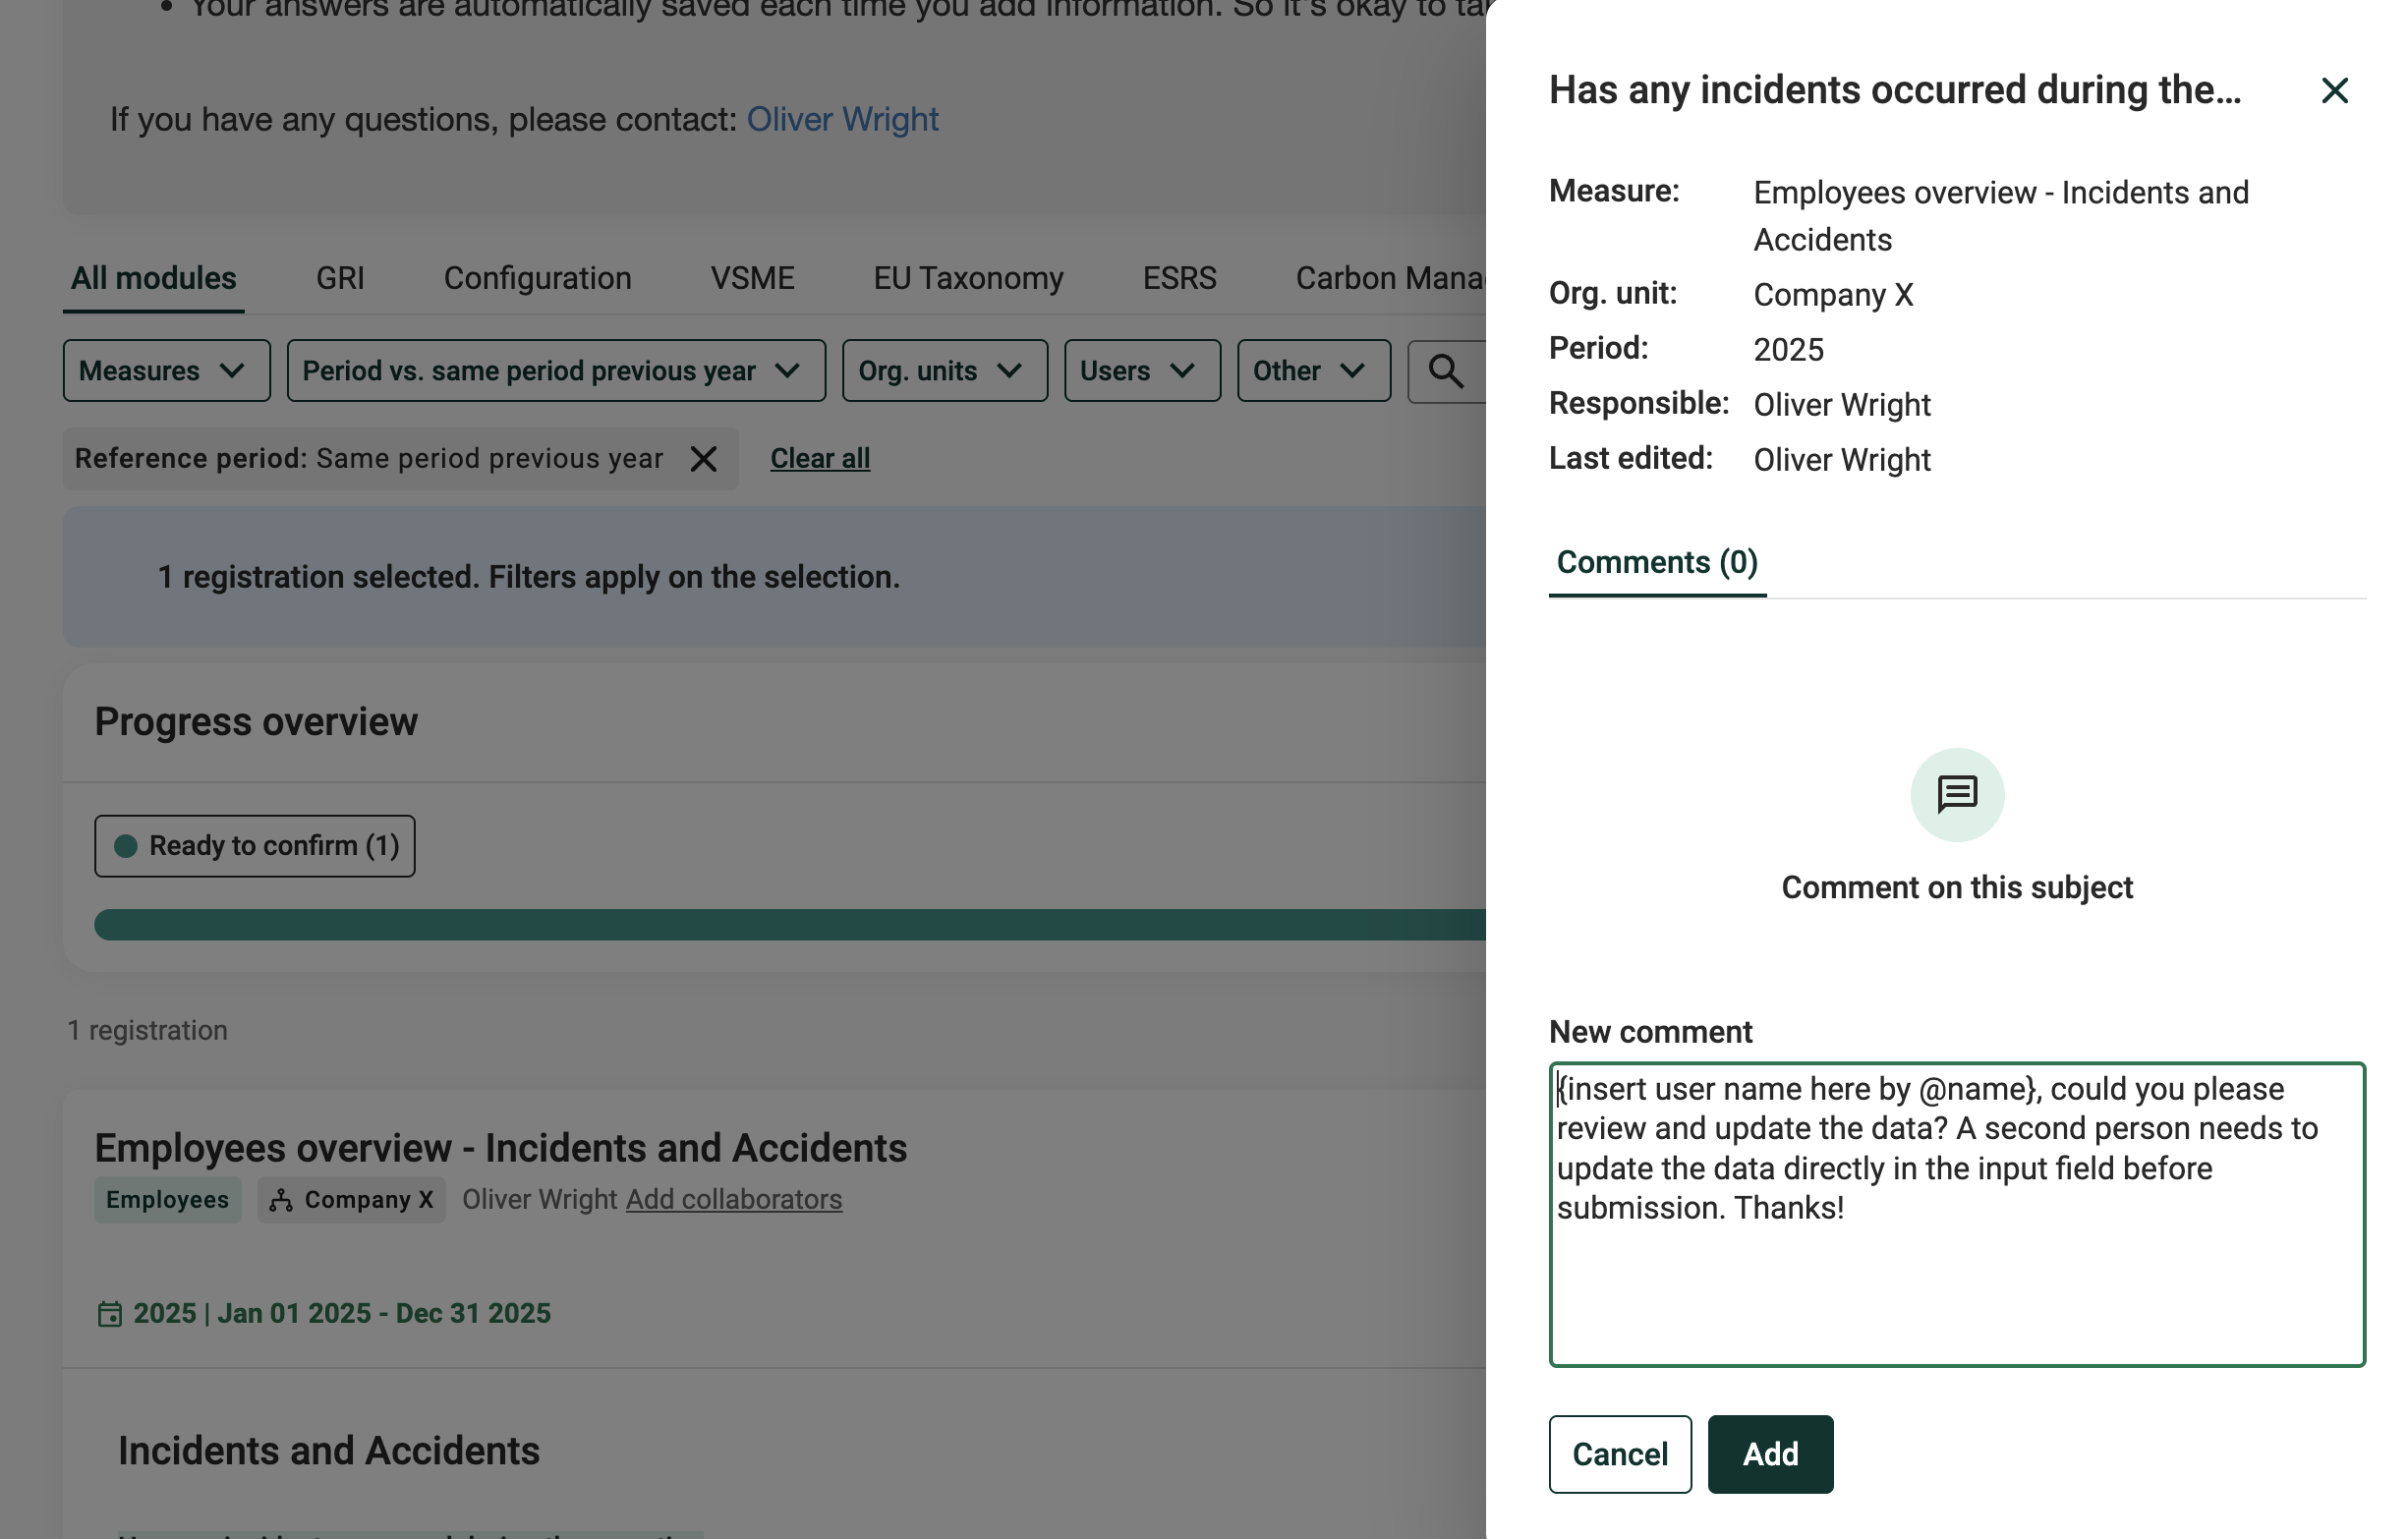 Example of a prefilled comment
- Click a data point in the list. Now the "Data reporting" view opens and scrolls down to the data point, where the reporter gets a suggested, prefilled comment to send to a collaborator. The reporter needs to @mention a collaborator and click "Add" comment. Both the mentioned collaborator and the reporter will get a notification.
- Ask a controller to review and confirm:
- Select an eligible user in the “Select controller” dropdown. The reporter selects an independent colleague with Controller rights from a list. Controllers belonging to the immediate organizational unit are presented at the top of the list.
- Click “Send request” to send a request to review and confirm. The selected user receives a notification and an email.
- The registration can still be confirmed using “Confirm anyway”.
- If confirmation proceeds via “Confirm anyway”, the nearest org.unit controller is automatically notified that a self-confirmation occurred.
If also the prevention setting is enabled
An error message shown instead: “You can't confirm data you have edited yourself. The reporter now has the two first options above. “Confirm anyway” is not available. Confirmation must be handed off.
Where self-confirmed data points are visible
A data point is marked as self-confirmed when the same user both last edited the data point and confirmed the registration. This marking is tracked if the warning or prevention settings are enabled.
In Review Data view
- Each self-confirmed data point shows a “Self-confirmed” indicator next to the value.
- The indicator includes a tooltip explaining that the same user last edited and confirmed the data point.
In Data Reporting view
- Registration header
If a confirmed registration contains one or more self-confirmed data points, a “Self-confirmed” chip with a count is shown in the registration header row. Selecting the chip expands the registration and jumps to the first self-confirmed field. - Individual data points
Each self-confirmed data point shows a “Self-confirmed” indicator next to the field. Selecting the indicator opens the data point detail panel, where a “Self-confirmed” label is shown next to the confirmation information.
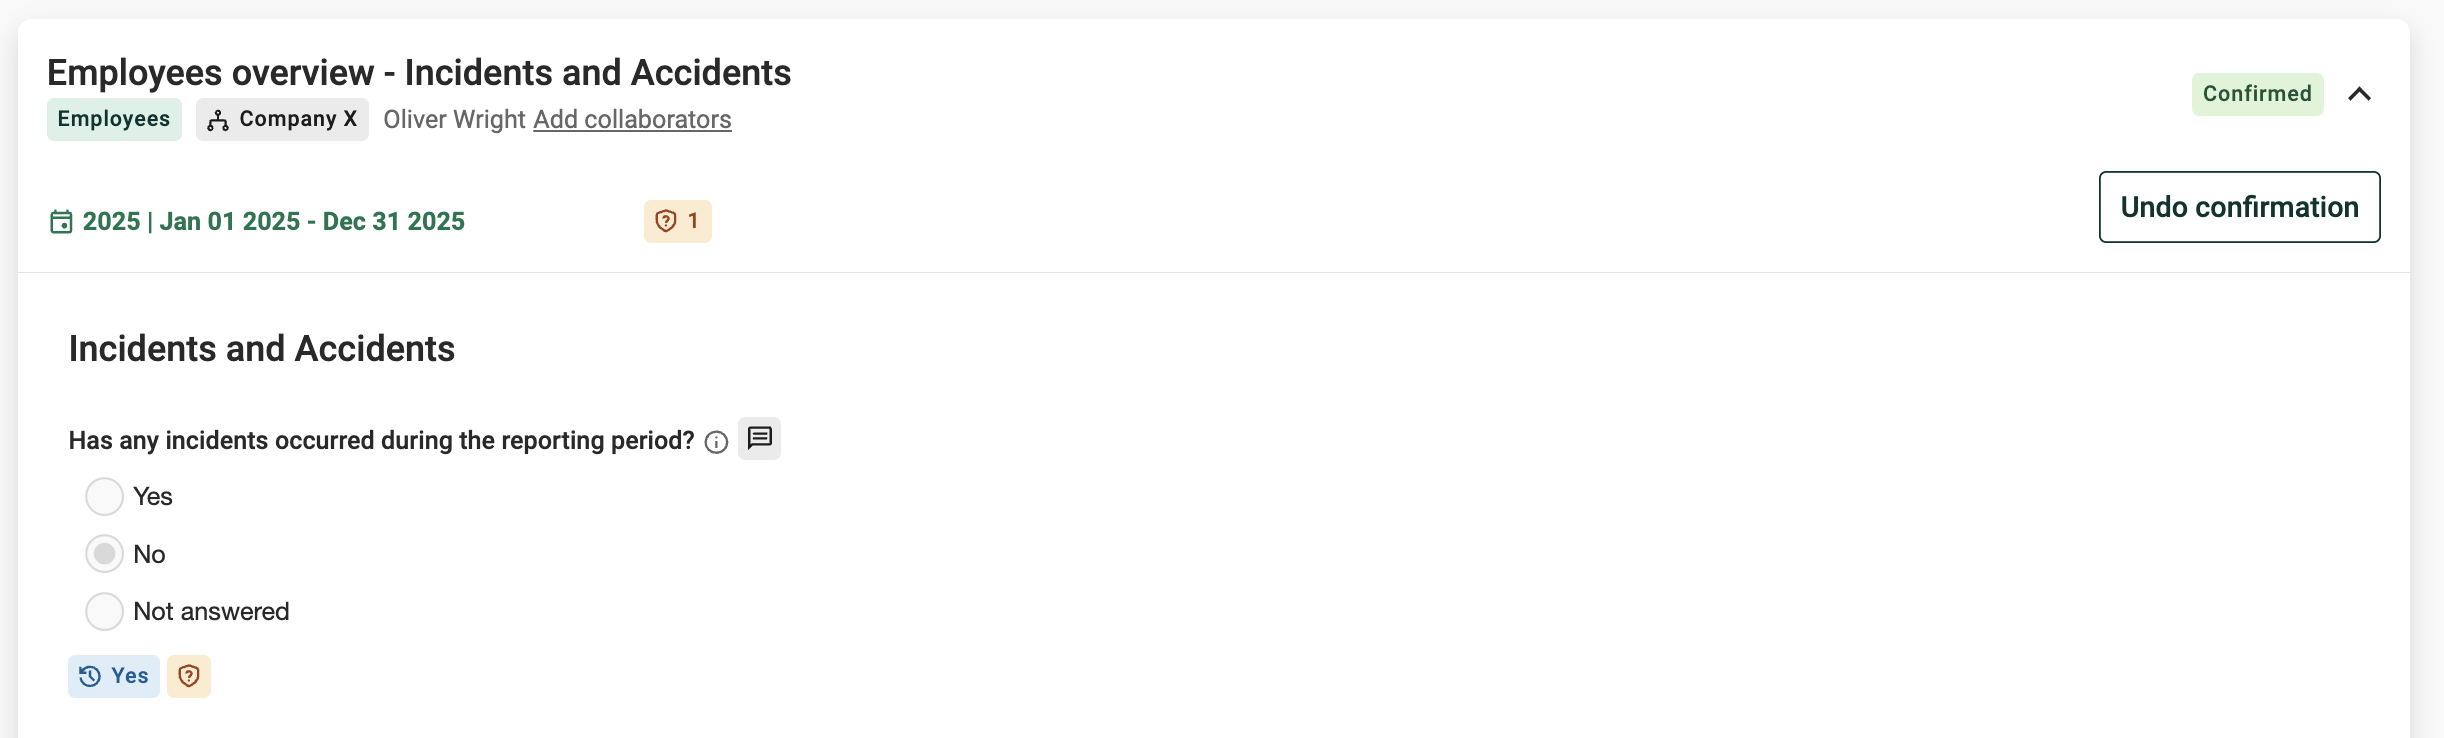
Example of how self-confirmed data points are presented in the Data reporting view
Was this article helpful?
That’s Great!
Thank you for your feedback
Sorry! We couldn't be helpful
Thank you for your feedback
Feedback sent
We appreciate your effort and will try to fix the article