Up-to-date emission factors are key to accurate reporting. Use the emission factor status and update tools to track, compare, and update factors.
For a step-by-step guide to updating and managing emission factors in Position Green, see this product tour: https://positiongreen.storylane.io/share/diesso8s88oa
This article shows how to update emission factors connected to the Emission Factor Library (EFL). To update emission factors that are not from the EFL, see Updating existing lists.
Identify which emission factor list is used
To identify which emission factor list a measure uses:
- On the Lists overview page, change the filter from All types to Emission factor.
- Hover over an emission factor list. An i icon appears on the right side of the screen.
- Click the i button. A dialog box shows which measures use the list.
Understand emission factor status
Every factor in the setup shows a status that indicates where action is needed:
- Up to date – matches the value in the library.
- Local properties added – extra properties have been added on top of the library value.
- Mismatch with library – the setup value doesn’t match the library value.
- New value available – a newer version exists compared to the most recent
validFrom. - N/A – the factor has no connection to the emission factor library.
Note:
A “Mismatch with library” status can also appear when the Item ValidFrom date has been changed in the setup, even if the emission factor value(s) remain the same.
This happens because the comparison is based on the ValidFrom date in both the setup and the library. If the ValidFrom date has been adjusted in the setup — for example, to align emission factors with a specific reporting year — the system will register this as a mismatch. In these cases, the mismatch does not necessarily indicate an error but may simply reflect a different approach to handling time validity.
Use the diff view
When a factor has the status “Local properties added” or “Mismatch with library”, compare the values side by side to see exactly what has changed before deciding how to update.
Choose an update method
Emission factors can be updated in two ways:
- Direct update (one by one): Open an item and update the factor directly. Best for full control.
- Bulk update (per list): Update many factors at once to save time.
How to update factors one by one
- Go to the item to update.
- Review the available values for that item.
- Click “Add to list item” to add them to the setup.
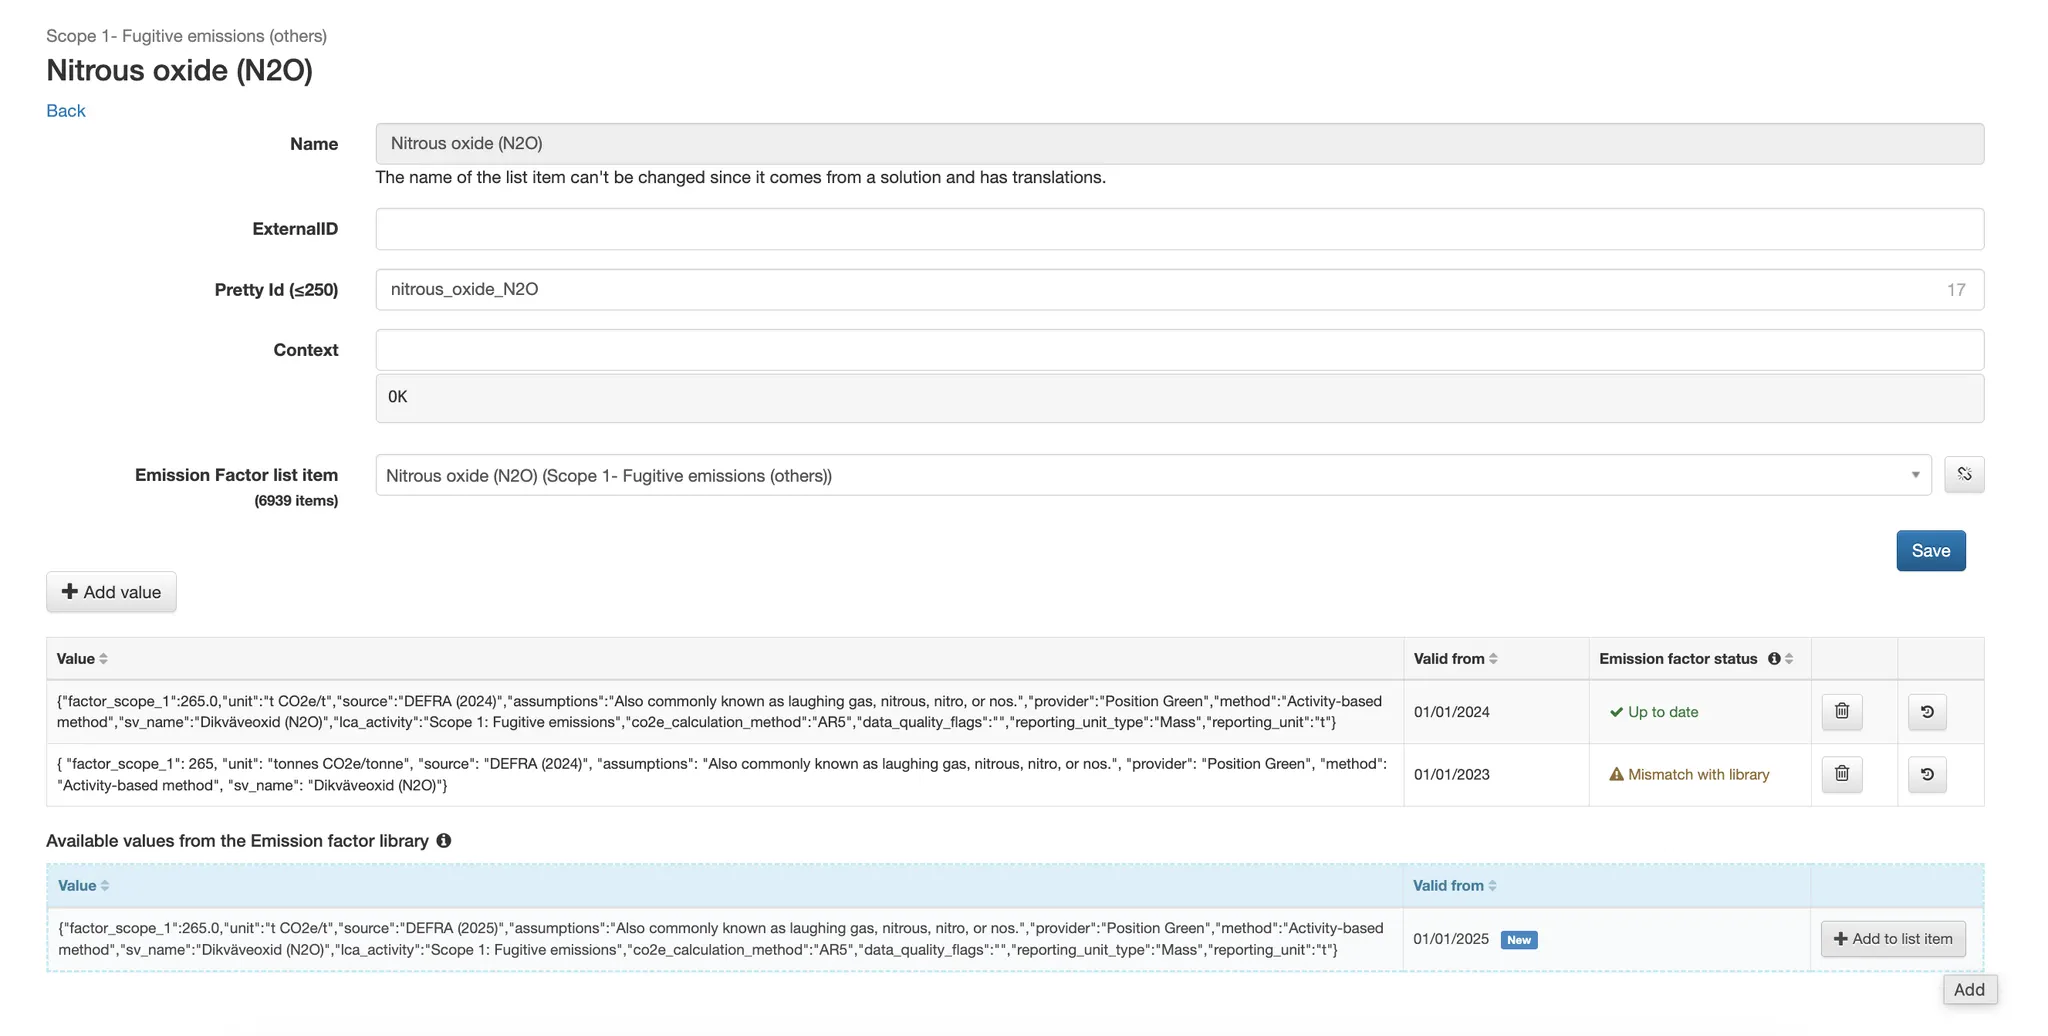
Updating a single emission factor
How to update factors in bulk
- Select the factors in the list to update.
- Click “Review Emission factor update”.
- Select the new values to apply.
- Click “Apply updates” to update the list with the latest factors.
Establish missing connections
If a factor is not connected to the library (status: N/A), it does not receive updates. In this case:
- Search for the correct factor in the library.
- Establish the connection manually.
This ensures the factor stays up to date for all future library updates.
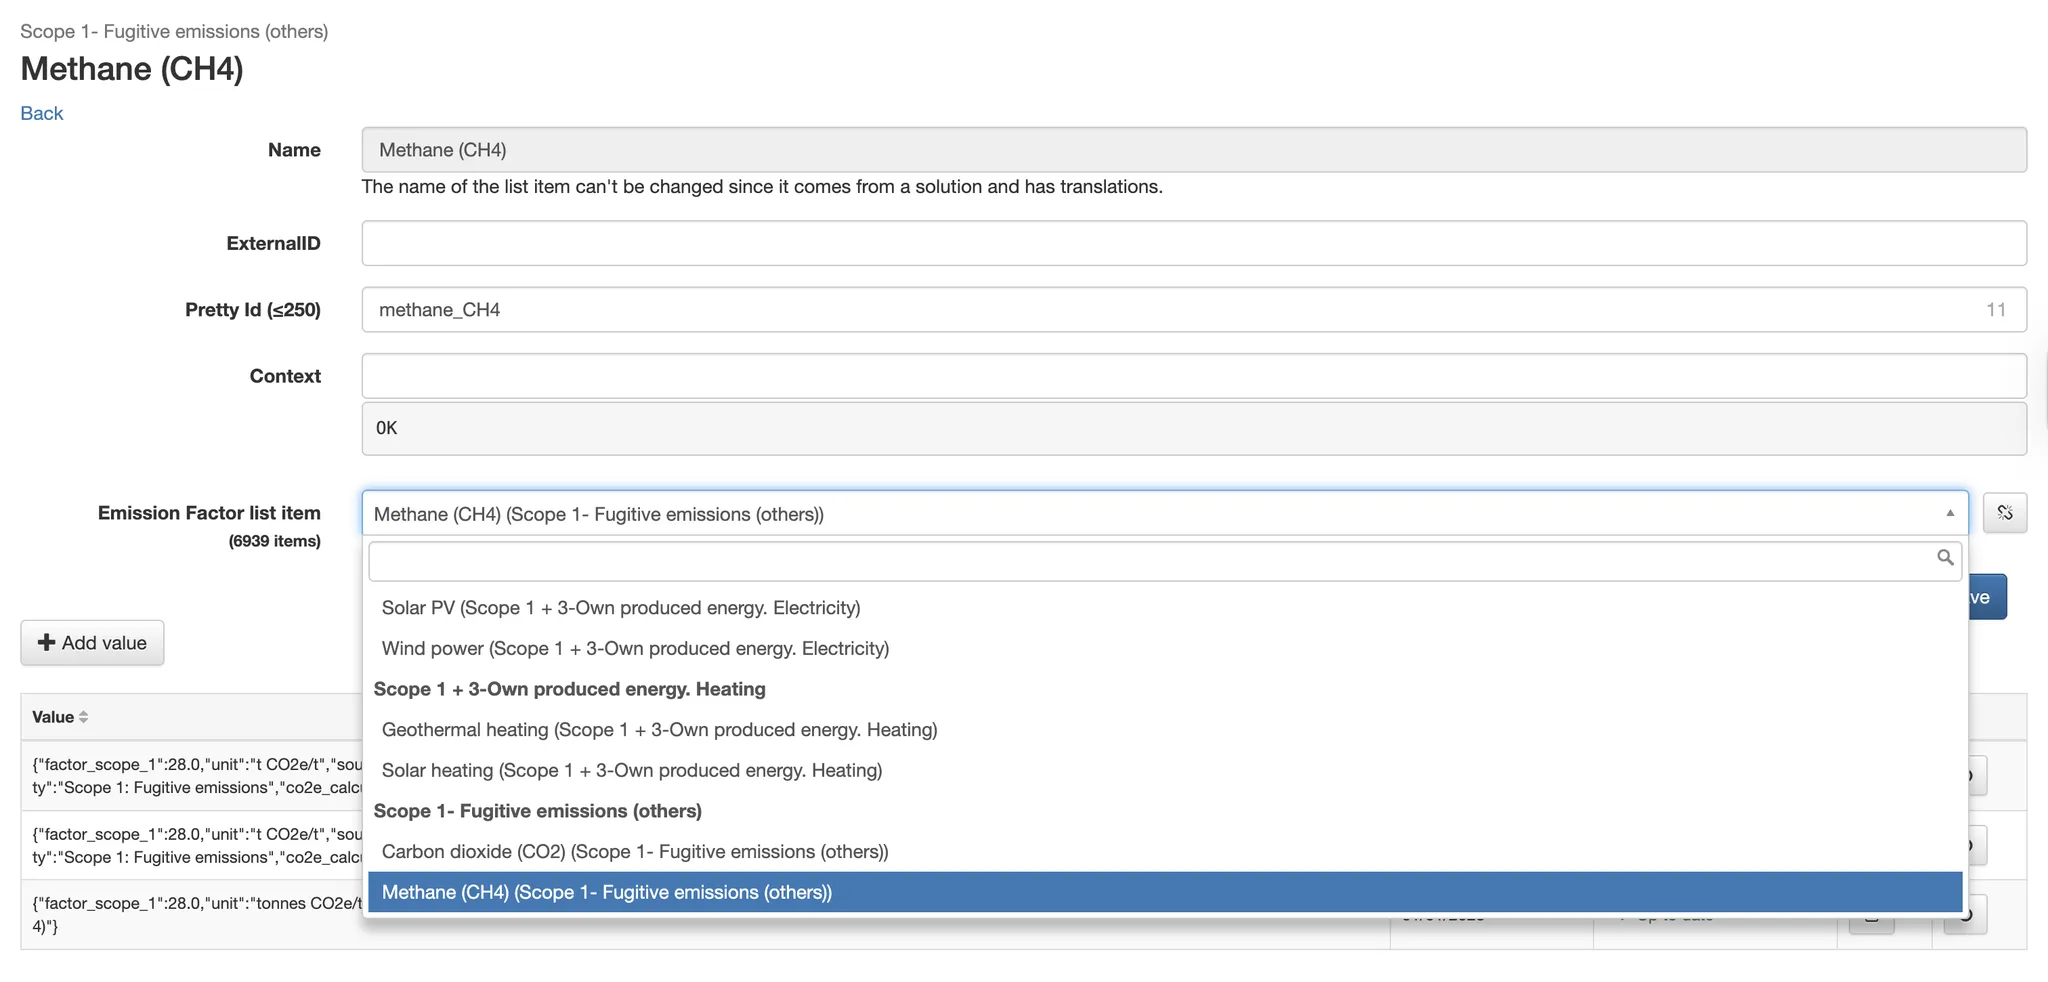
Connecting a factor to the library
Handling historical data updates
If an emission factor is updated for a period that already has reported data, a recalculation is required for the changes to flow through to visualizations and reports. Contact the Customer Success Manager to request the recalculation.
If an emission factor is added or updated for a period with no reported data, no recalculation is needed and the updated value automatically applies to future reporting.
Was this article helpful?
That’s Great!
Thank you for your feedback
Sorry! We couldn't be helpful
Thank you for your feedback
Feedback sent
We appreciate your effort and will try to fix the article